SUMMARY: Need jumps in your yard? Here are a couple of ways to do it. (AKA: Entropy 2: Jumps don't last forever.)
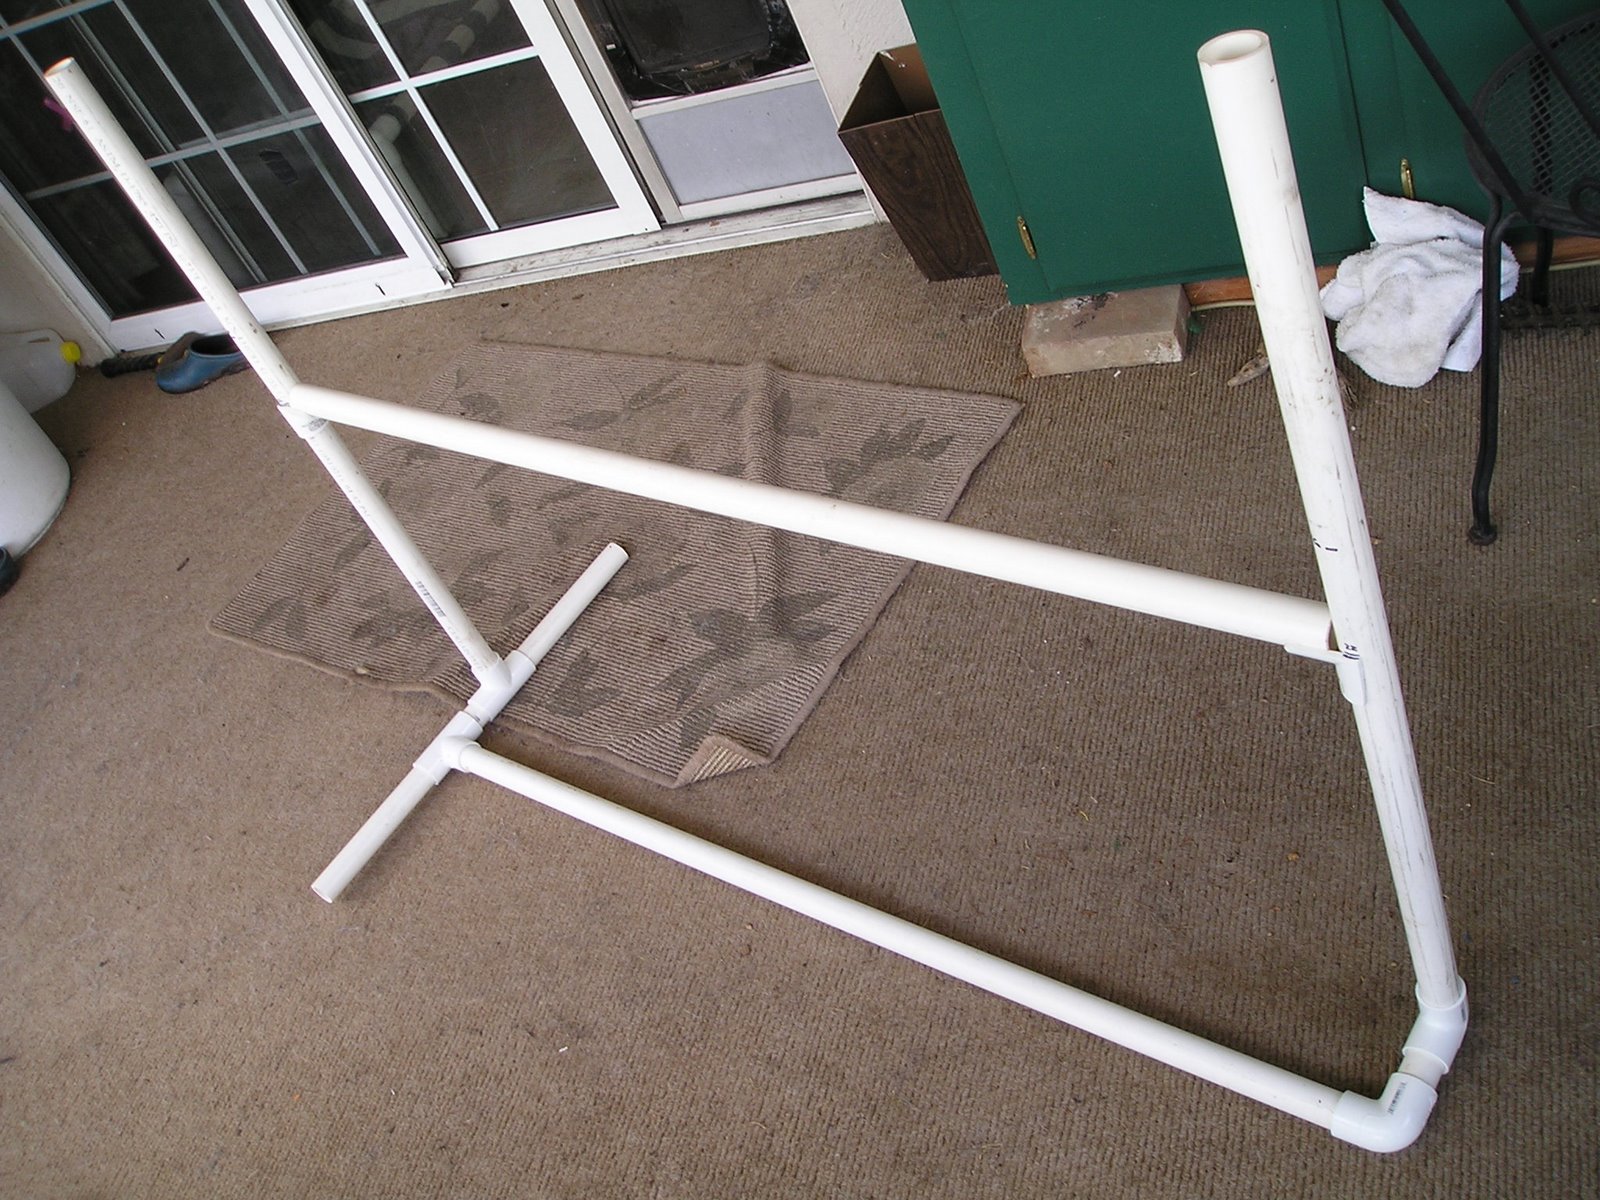
Once upon a time, after I had taken agility classes for a few weeks or months, I decided to build my own jumps. I can do PVC stuff, so I adopted some plans that I got off the web somewhere and built 3 jumps. They looked like this (except less broken):
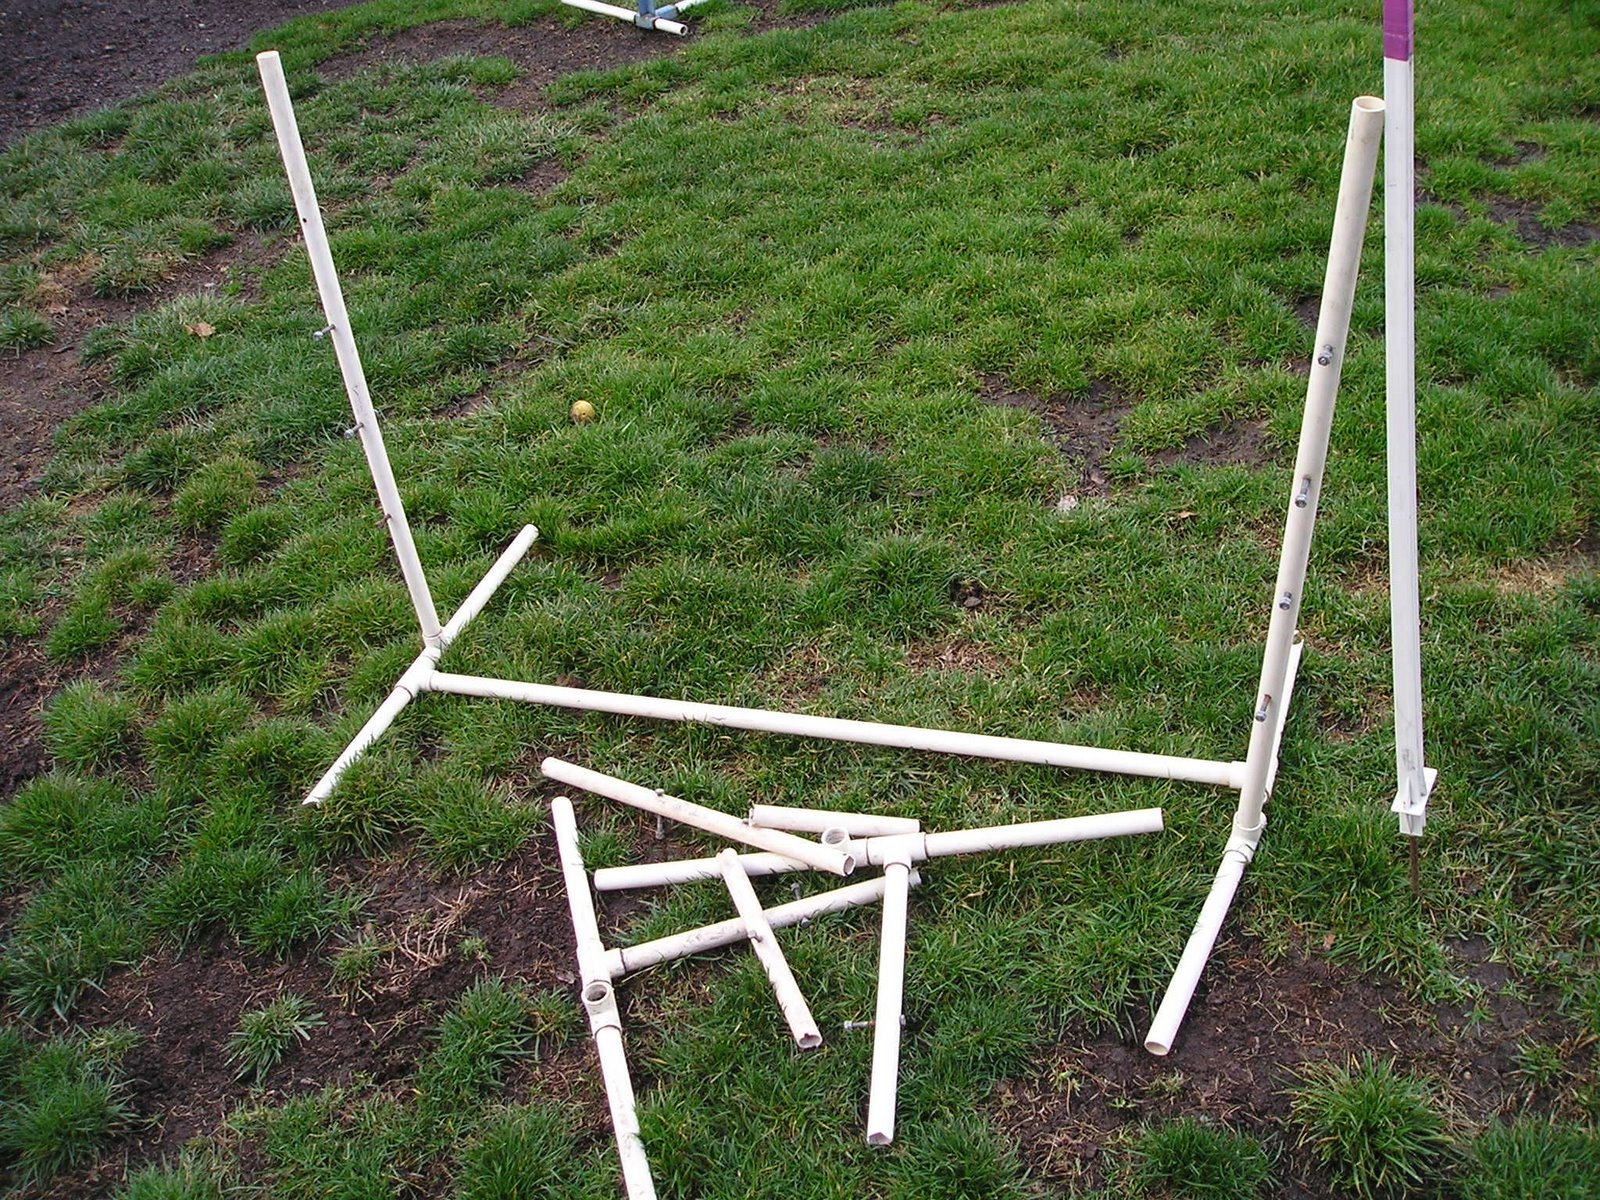
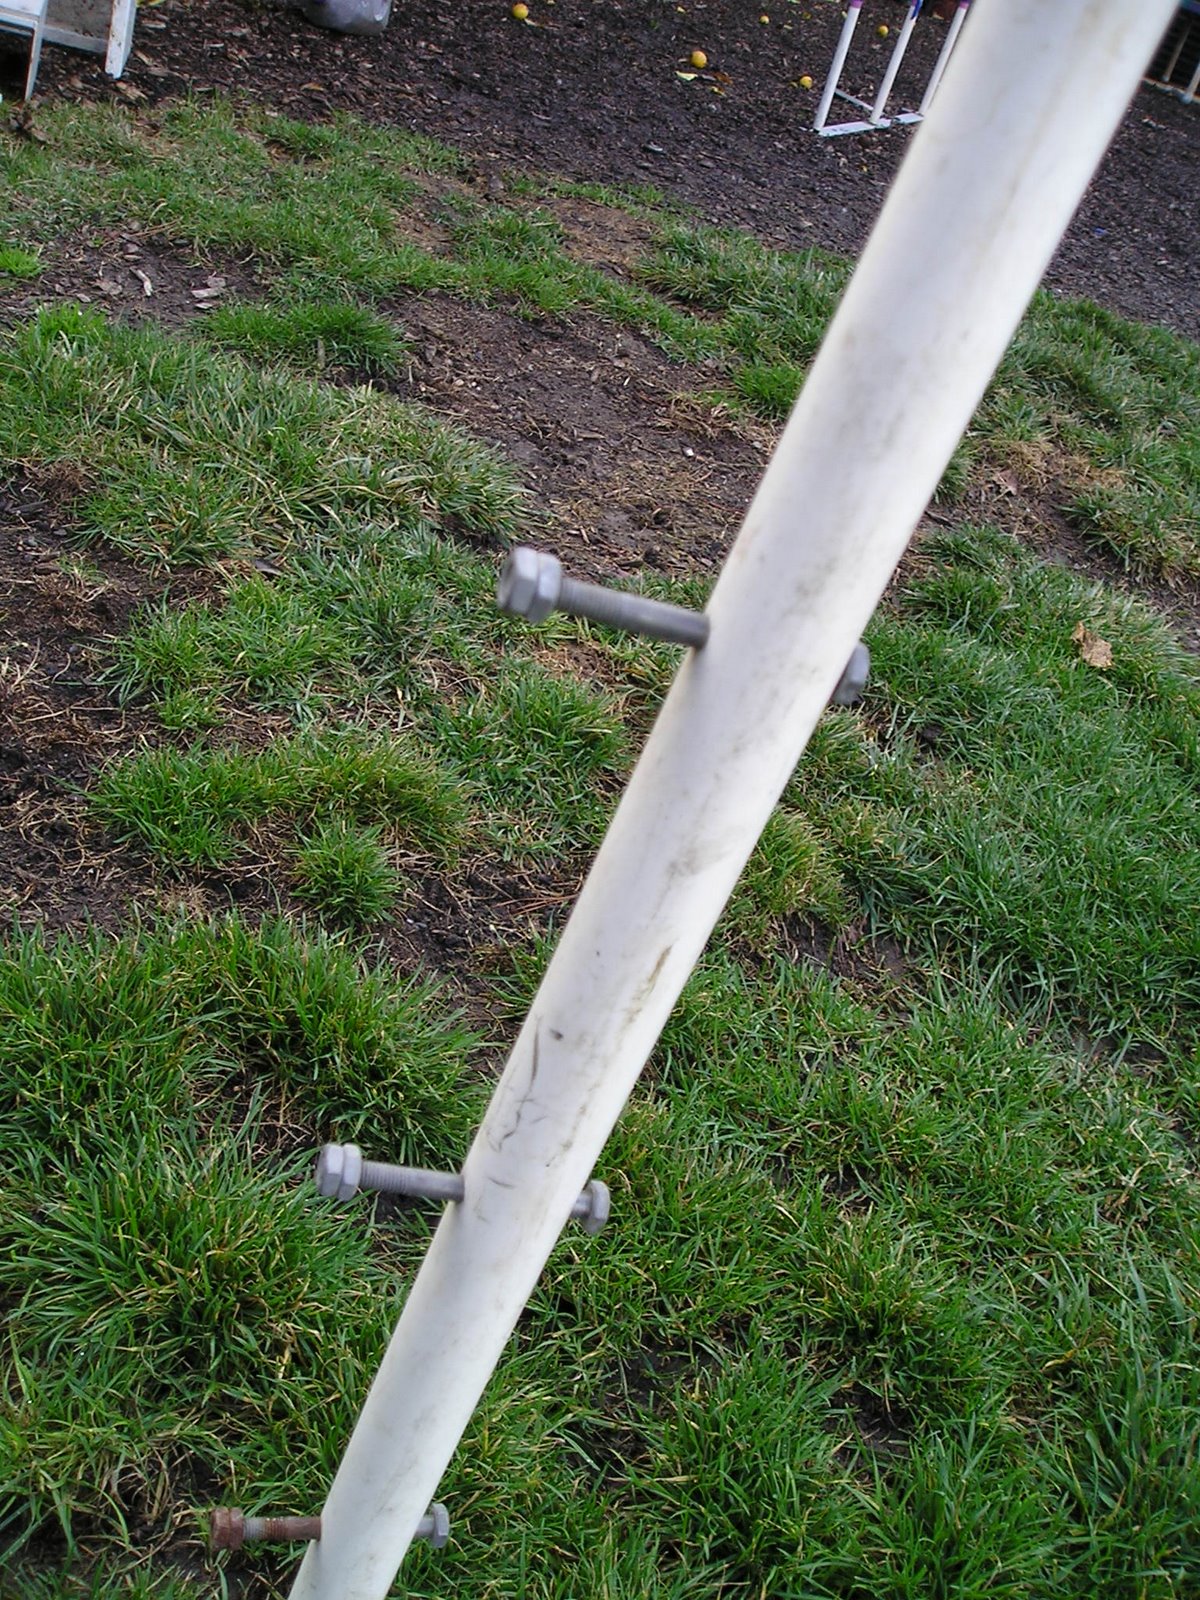
I made them from thin-walled ("Schedule 120") 3/4" PVC, then drilled holes through the uprights and inserted bolts, which I laid the jump bars across.
Well, funny dang thing happens over time: PVC becomes brittle. Especially the narrower, thin-walled kind. So then, hitting them with the Favorite Jolly Ball Toy, or bumping into them too hard, or any other little accident just snaps them apart--as you can see from all the small and leaning pieces in the top photo.
So it's clear that it's time to build more jumps. The bolt-style jump cups were never ideal, and nowadays you can buy jump cups from all kinds of people online (couldn't back in 1996 when I built mine), so yesterday I bought several 1" snap-on cups from a local vendor at the trial, Miller's Agility Jumps & Weaves. (Huh--I don't see a web site for them; phone is 707-542-2923. They sell complete PVC jumps as well as the cups separately for either 3/4" or 1" PVC.)
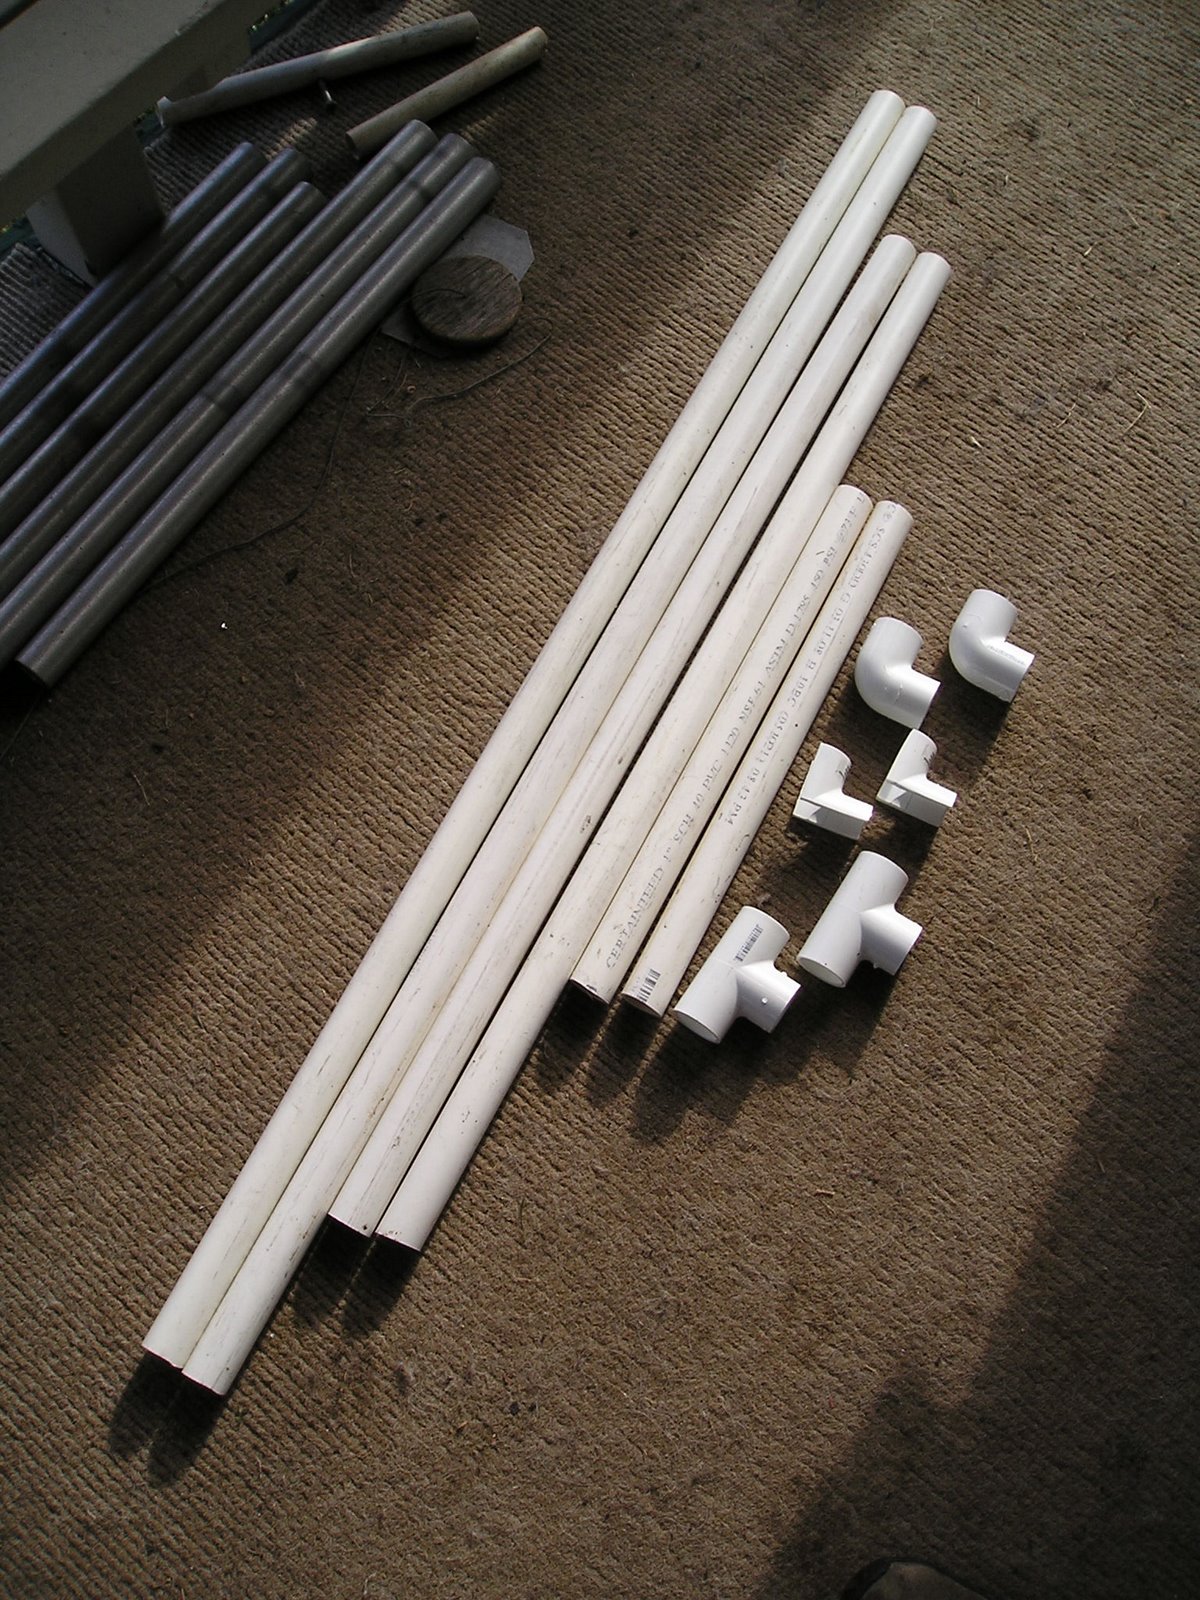
On the way home, I stopped at the local OSH (nice hardware store) that sells precut PVC pieces or will cut them to size for you at no charge. For each jump, I bought 1" PVC connectors and 1" thick-walled ("schedule 40") PVC in the following lengths:
- Two 4-foot
- Two 3-foot
- One 18" (although what I wanted was two 9" or so--this was the smallest precut they had, and I can cut my own at home)
- One 18" to cut into smaller pieces
- Two T slip-slip-slip connectors
- Two elbow slip-slip connectors
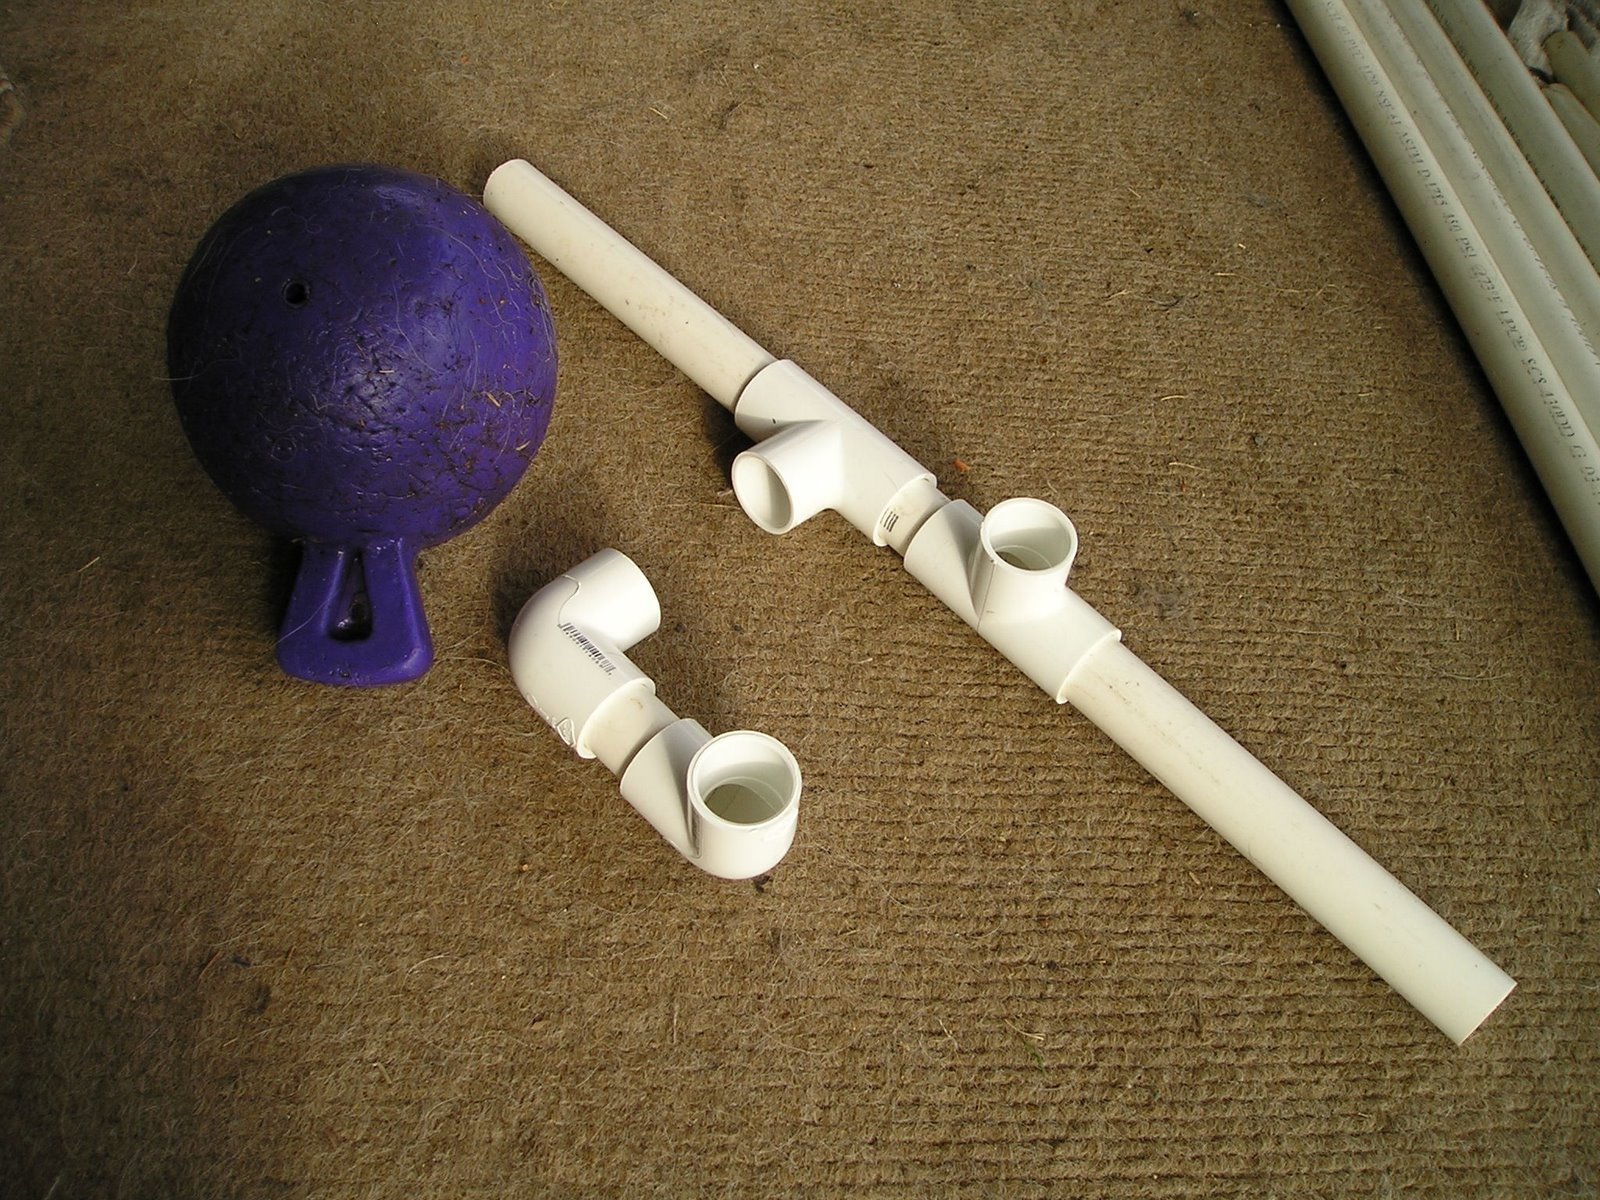
I cut one of the 18" into 2 pieces using my PVC cutter. You can do it with a hacksaw, too.

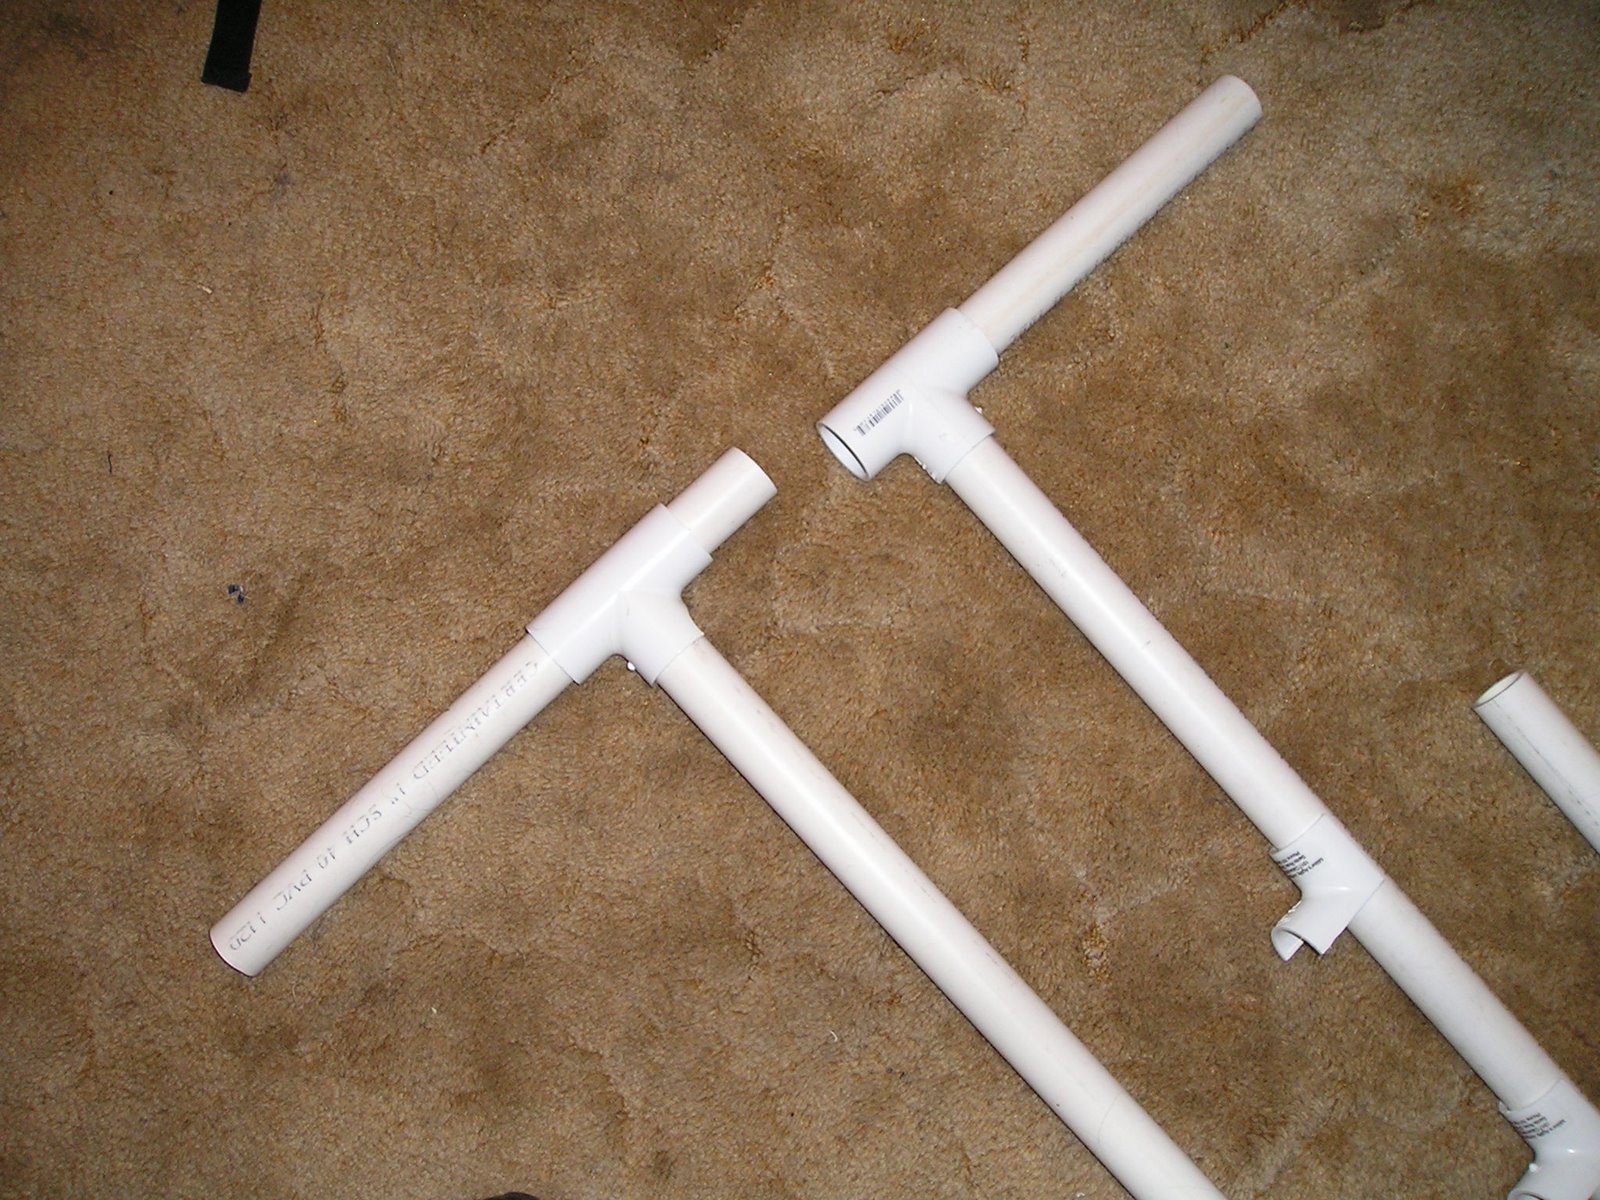
Out of the second 18" piece, I cut two 2-inch pieces. Then I lined up the connectors with these smaller pieces like this to make the sides of the base:

I dry fit (no glue) the pieces together so they looked like this, including one Favorite Jolly Ball Toy that kept getting dropped into my working area by some furry beasts who thought that this project looked dull:
Then I put one four-foot length between the sides of the base to serve as the ground bar, put two three-footers in the upright-facing connectors, snapped on my purchased jump cups, and laid the other four-foot section on the cups, so my assembled jump looks like:
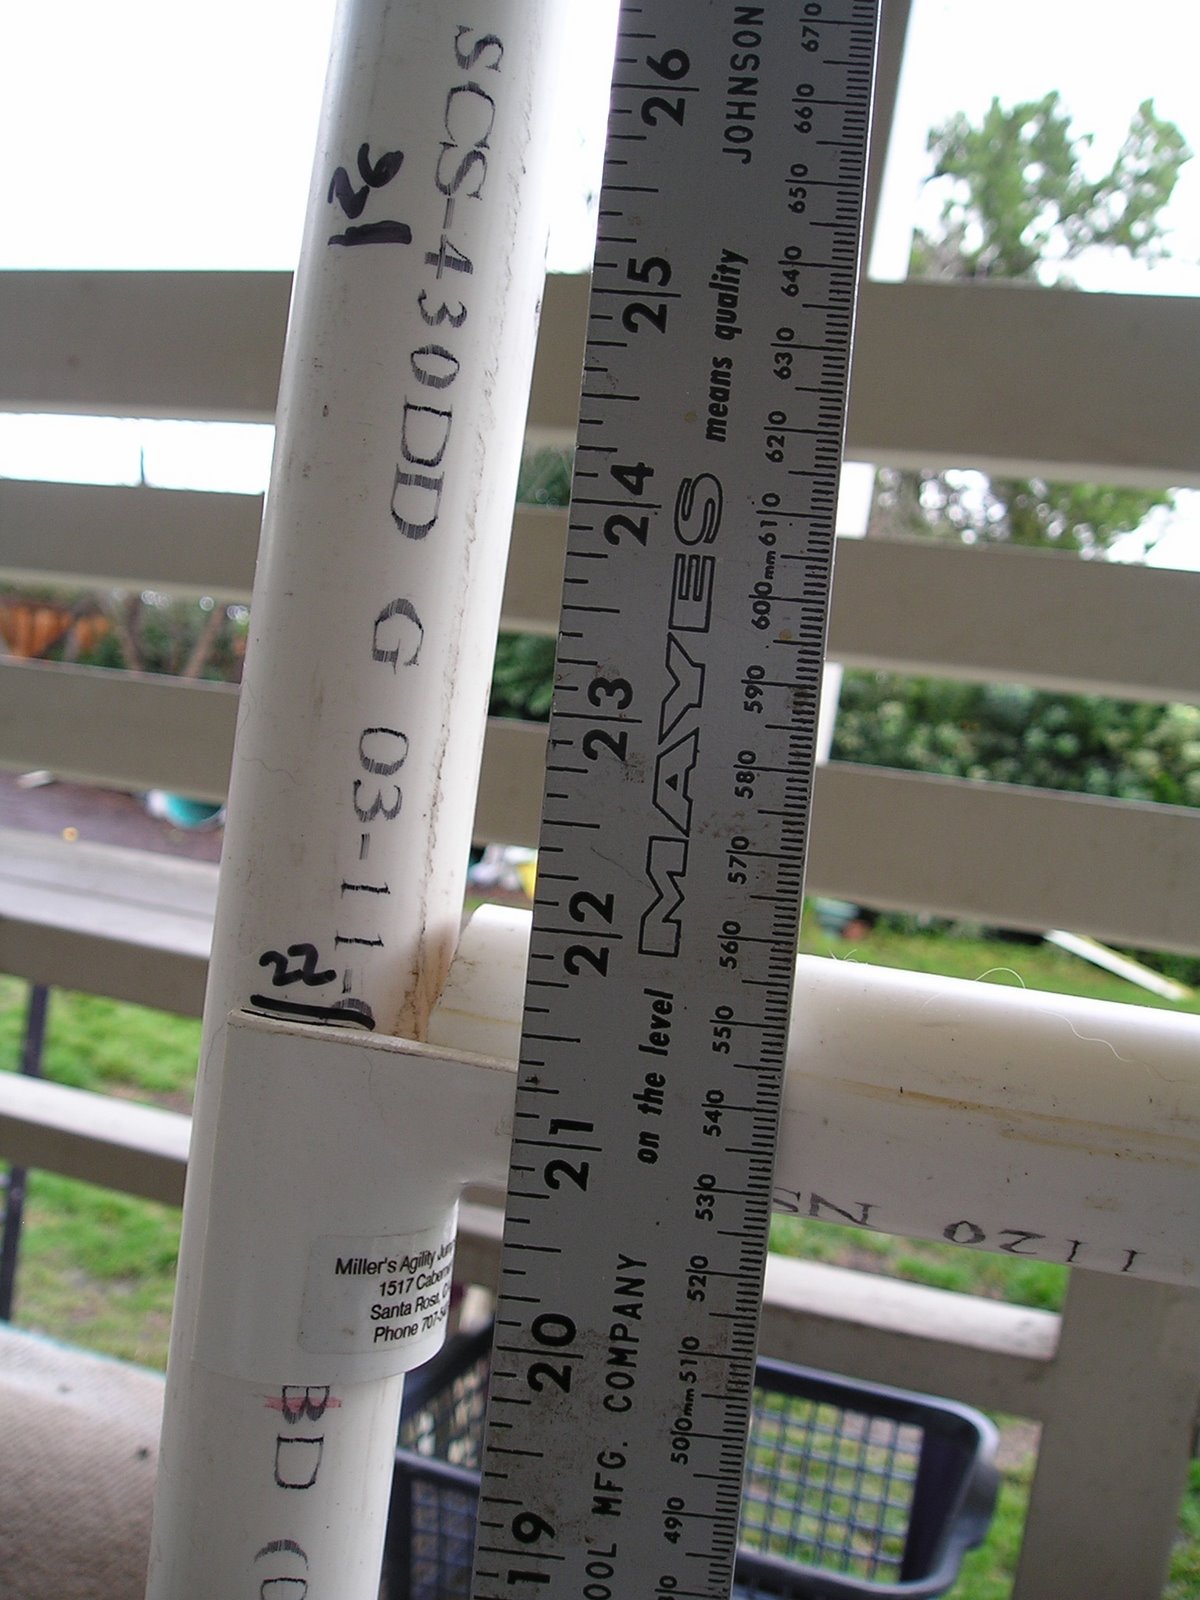
When your jump is fully assembled, move the jump cups up or down until the top of the bar is at your favorite height; this one is at 22". Then mark on the upright where the cup has to attach for the bar to be there. IMPORTANT: If you're going to glue your bases together, do that BEFORE marking the measurements, as the pieces will fit more tightly with the lubrication of the glue.
Gluing: You don't have to glue things, but dry-fit PVC will come loose fairly easily, so I recommend gluing the parts in the sides of the base and the uprights, NOT the long ground bar, because it's nice to be able to disassemble and store them or move them. You can buy a small jar of PVC cement for not very much. Do it this way to make sure that all the angles are correct:
- Disassemble all pieces
- Glue one 9" piece into one side of one of the Ts; glue the other 9" piece into one side of the other T (see photo above as a reminder).
- Glue ONE end of one of the 2" pieces into ONE of the Ts.
- Glue one end of the 3' upright into the TOP of the OTHER T.
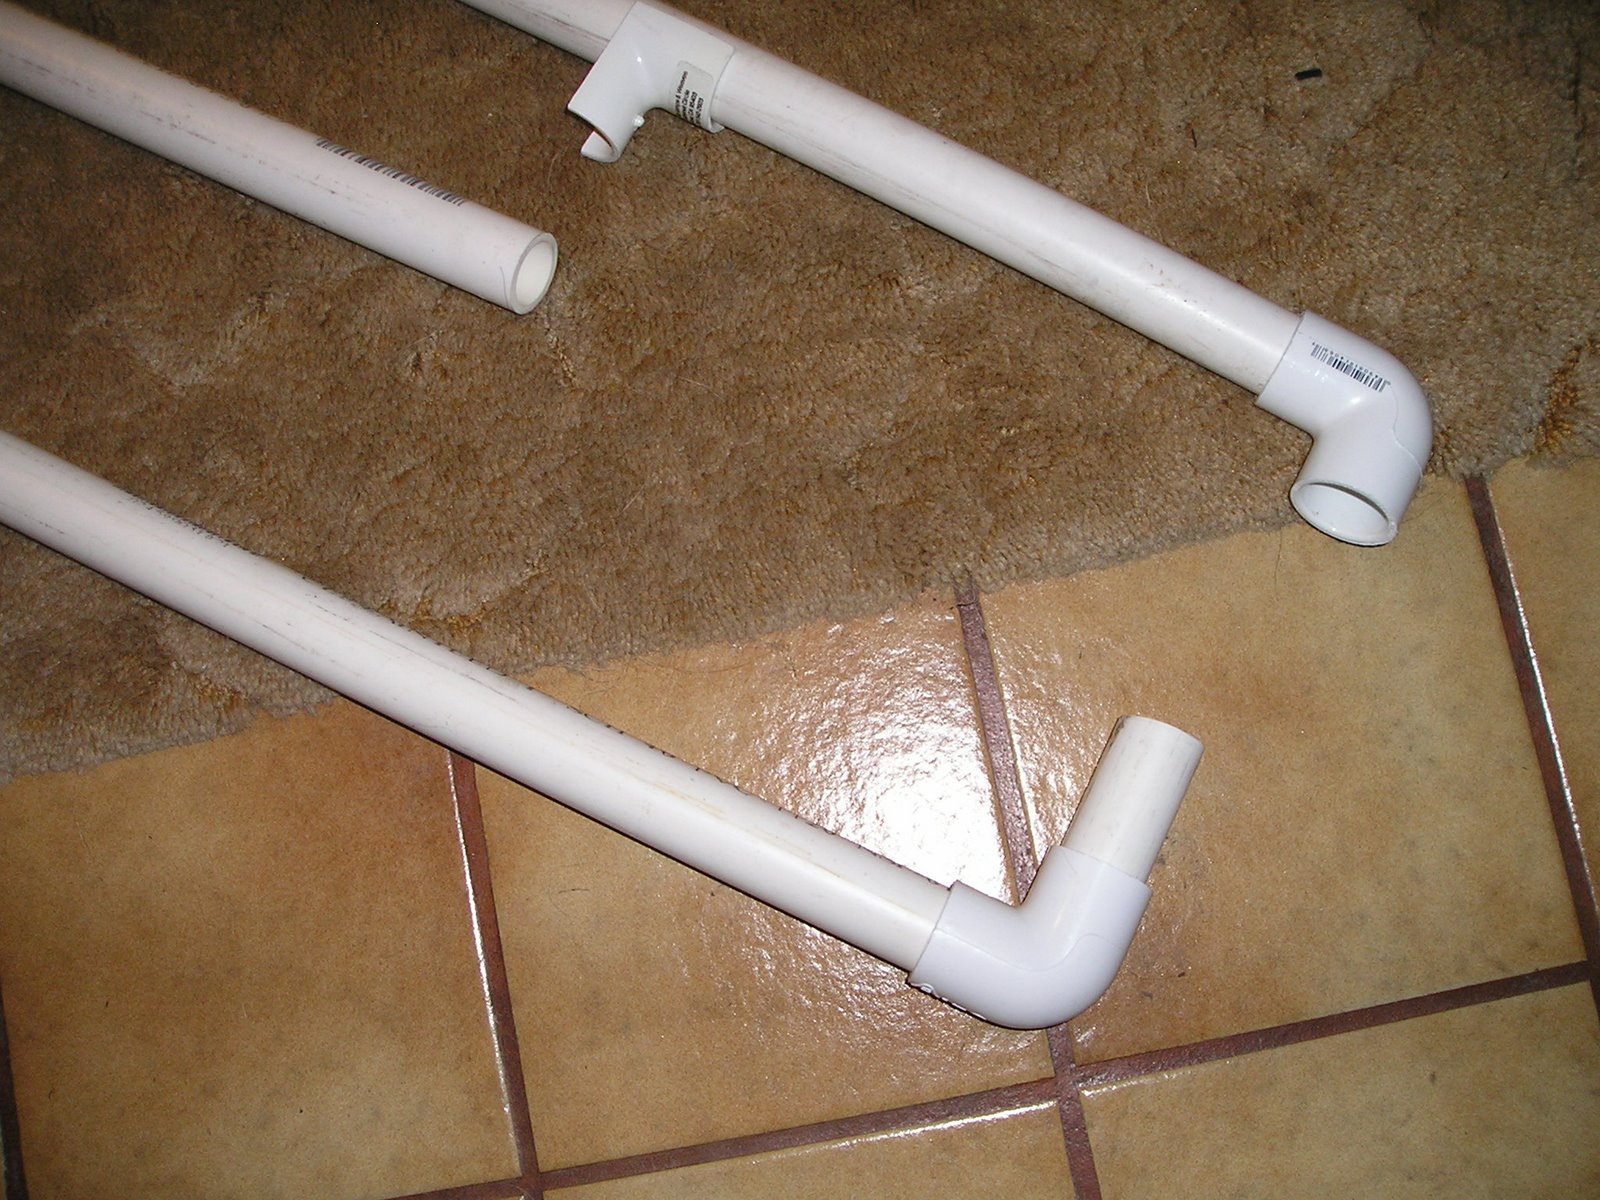
- Put one end of the groundbar UNGLUED into the "stem" of the T with the 2" piece. Now you've got this:
- Glue ONE end of the other 2" piece into ONE of the elbows.
- Glue the other 3' upright into one end of the OTHER elbow.
- Put the other end of the ground bar UNGLUED into the elbow that has the 2" piece glued in one end. Now you've got this:
- Working quickly, put plenty of glue on the inside of the open end of the elbow and the end of the 2" piece so they'll slide really well. Holding the 3' upright in an upright position, slip it onto the 2" piece all the way, and quickly adjust it so that it is standing straight up at a 90-degree angle to the ground. Let it sit for a minute or two to set a bit.
- Do the same on the other end: lots of glue on the open end of the T and the end of the 2" piece, hold upright upright, slip together quickly and twist the upright as needed so that it's perfectly straight up and down. Double-check the other end to be sure you haven't changed its alignment.
- Let dry completely before doing anything else, preferably a few hours.
Here's another way to get jumps, although it's not as reliable. Enter a cool workers raffle and win one. I've been tossing a ticket or two into the jump and tunnel raffles for many years. Back in 1996 or 1997, I actually won one, of the type with PVC that slips through the bases of the uprights for ground support, like this:
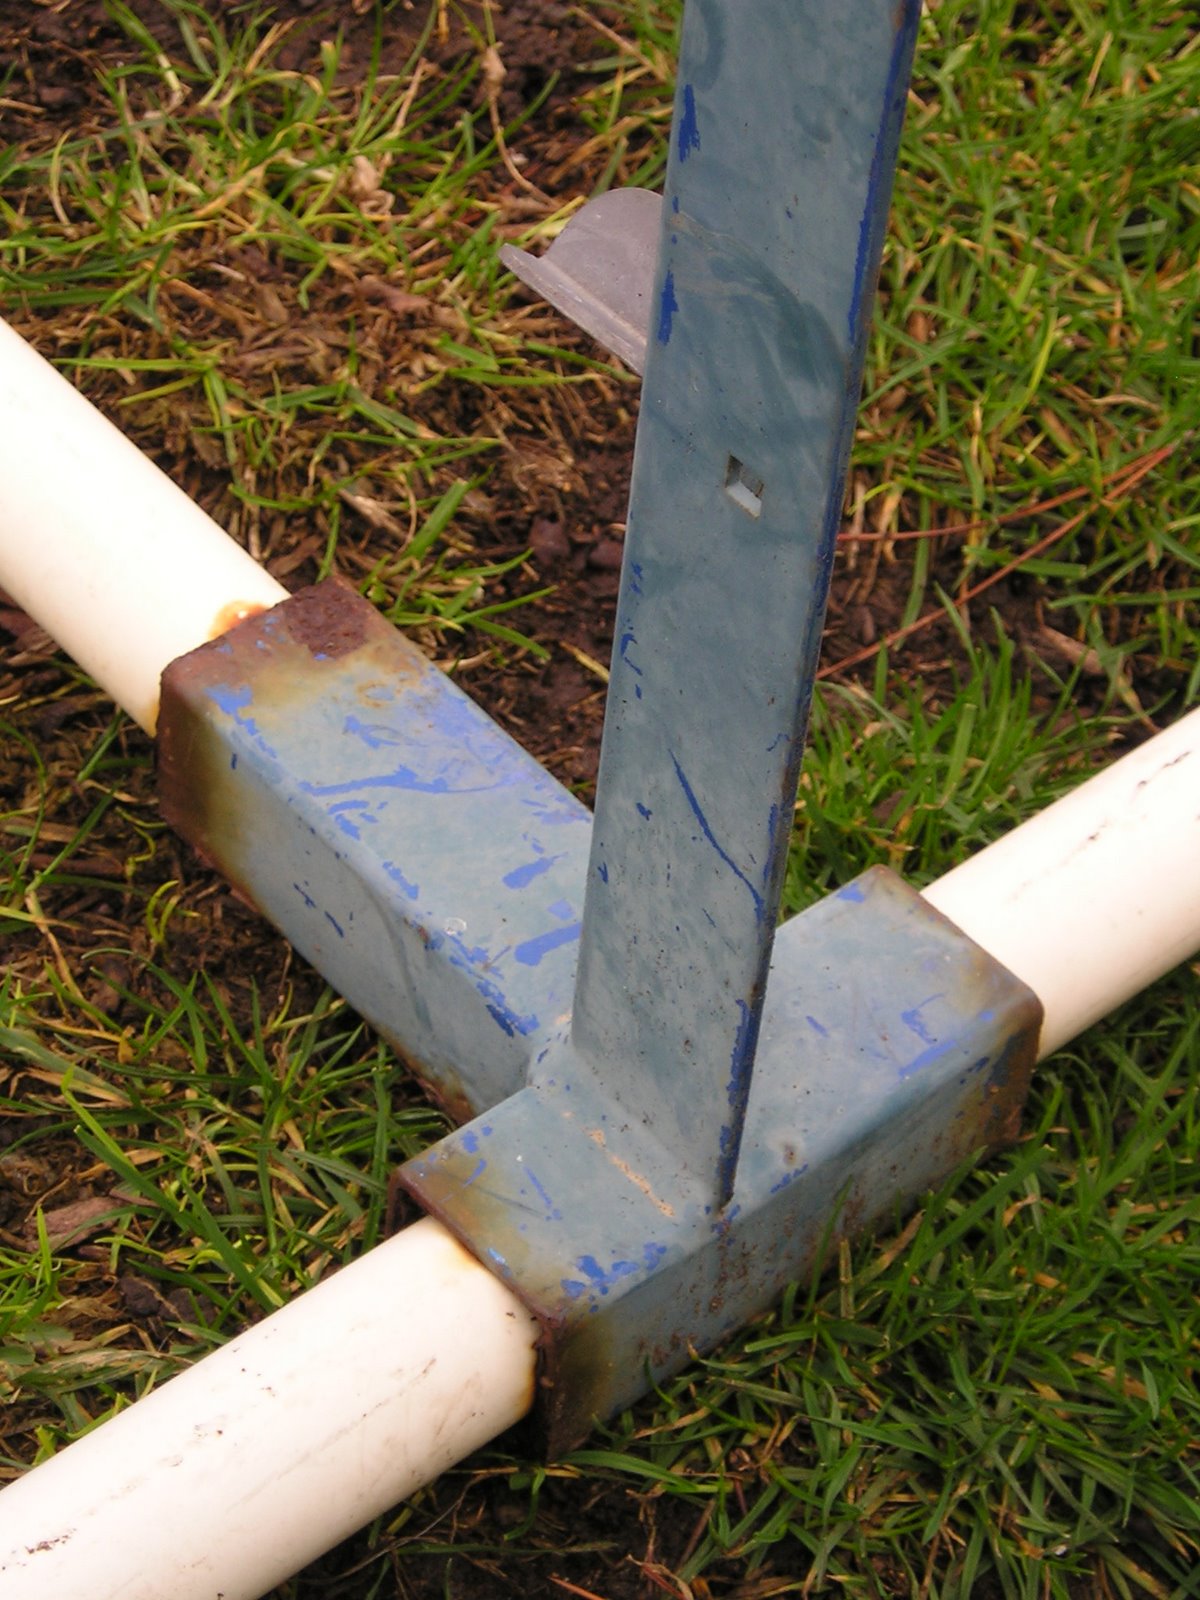
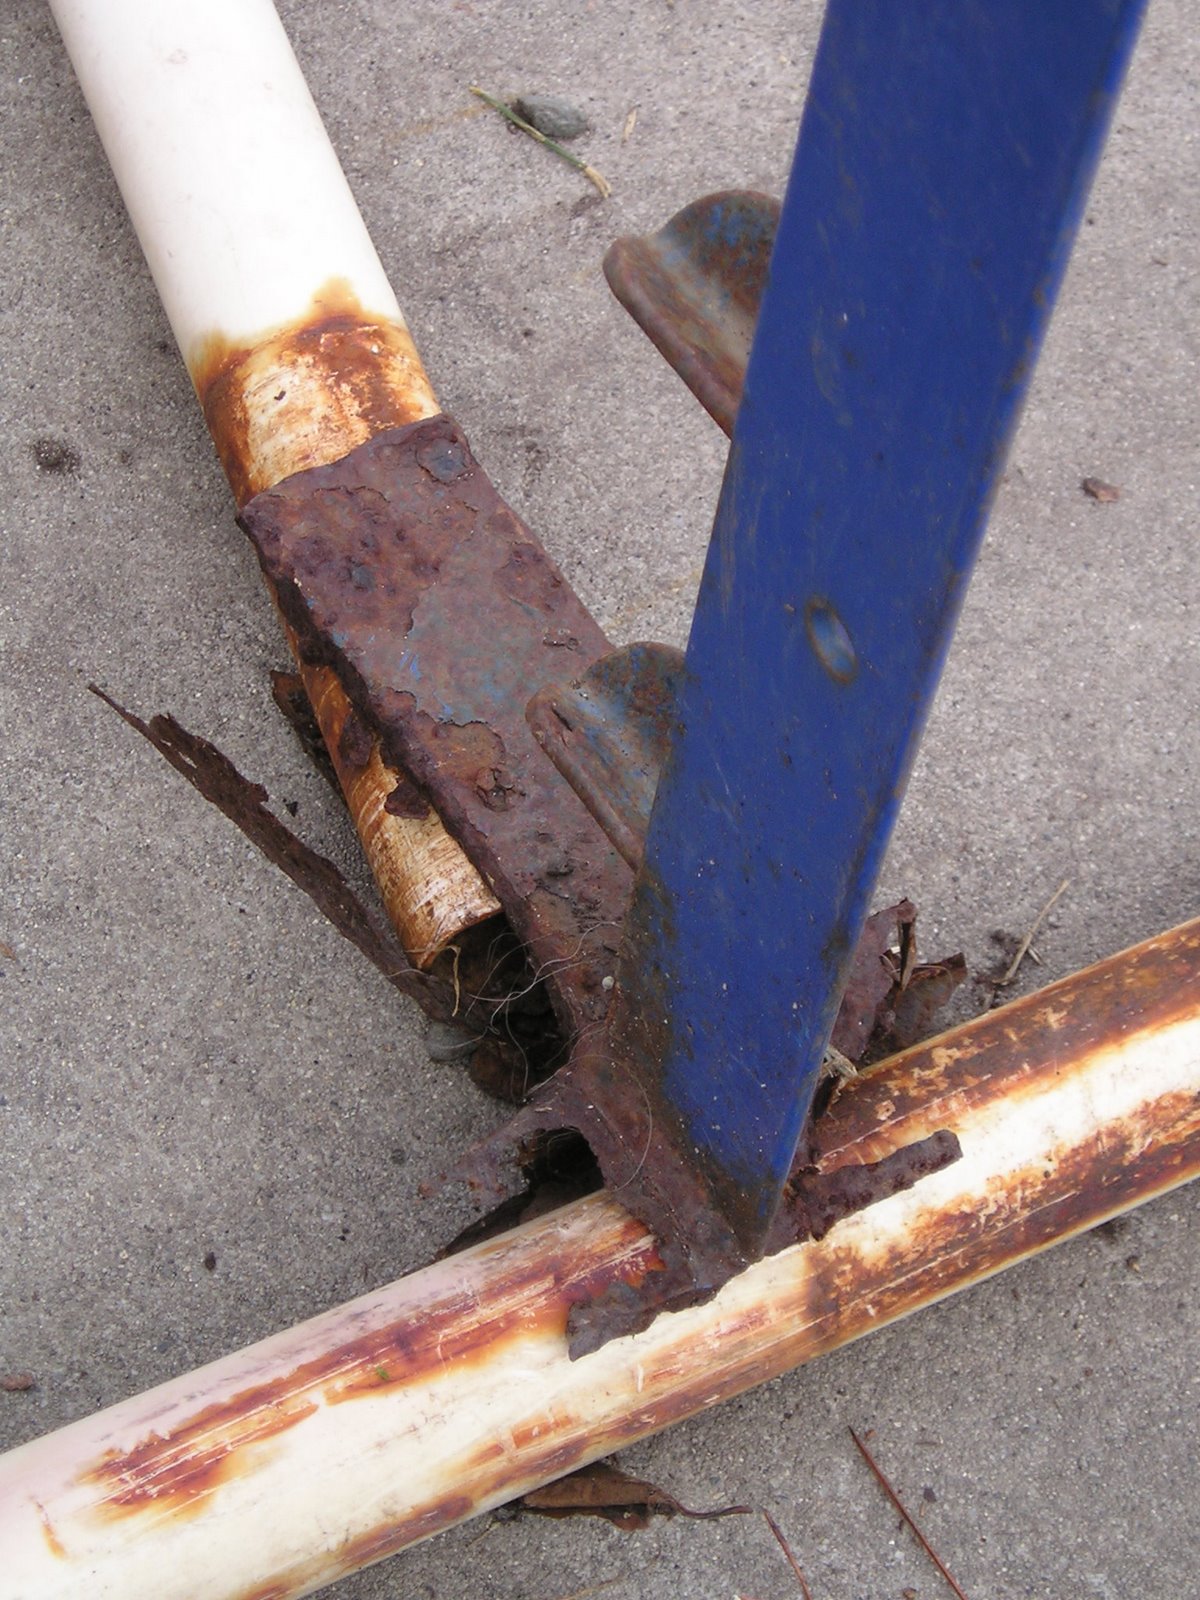
Well, funny dang thing happens over time: Metal rusts. Especially if you leave it out on the lawn 24/7/365 for 12 or 13 years, until there's nothing left to hold the PVC in place, and then your uprights start being downright un-up:
So then you can get lucky again, as I did Saturday evening, when they pull your name out of the box to win a lovely new purple jump! Woohoo!
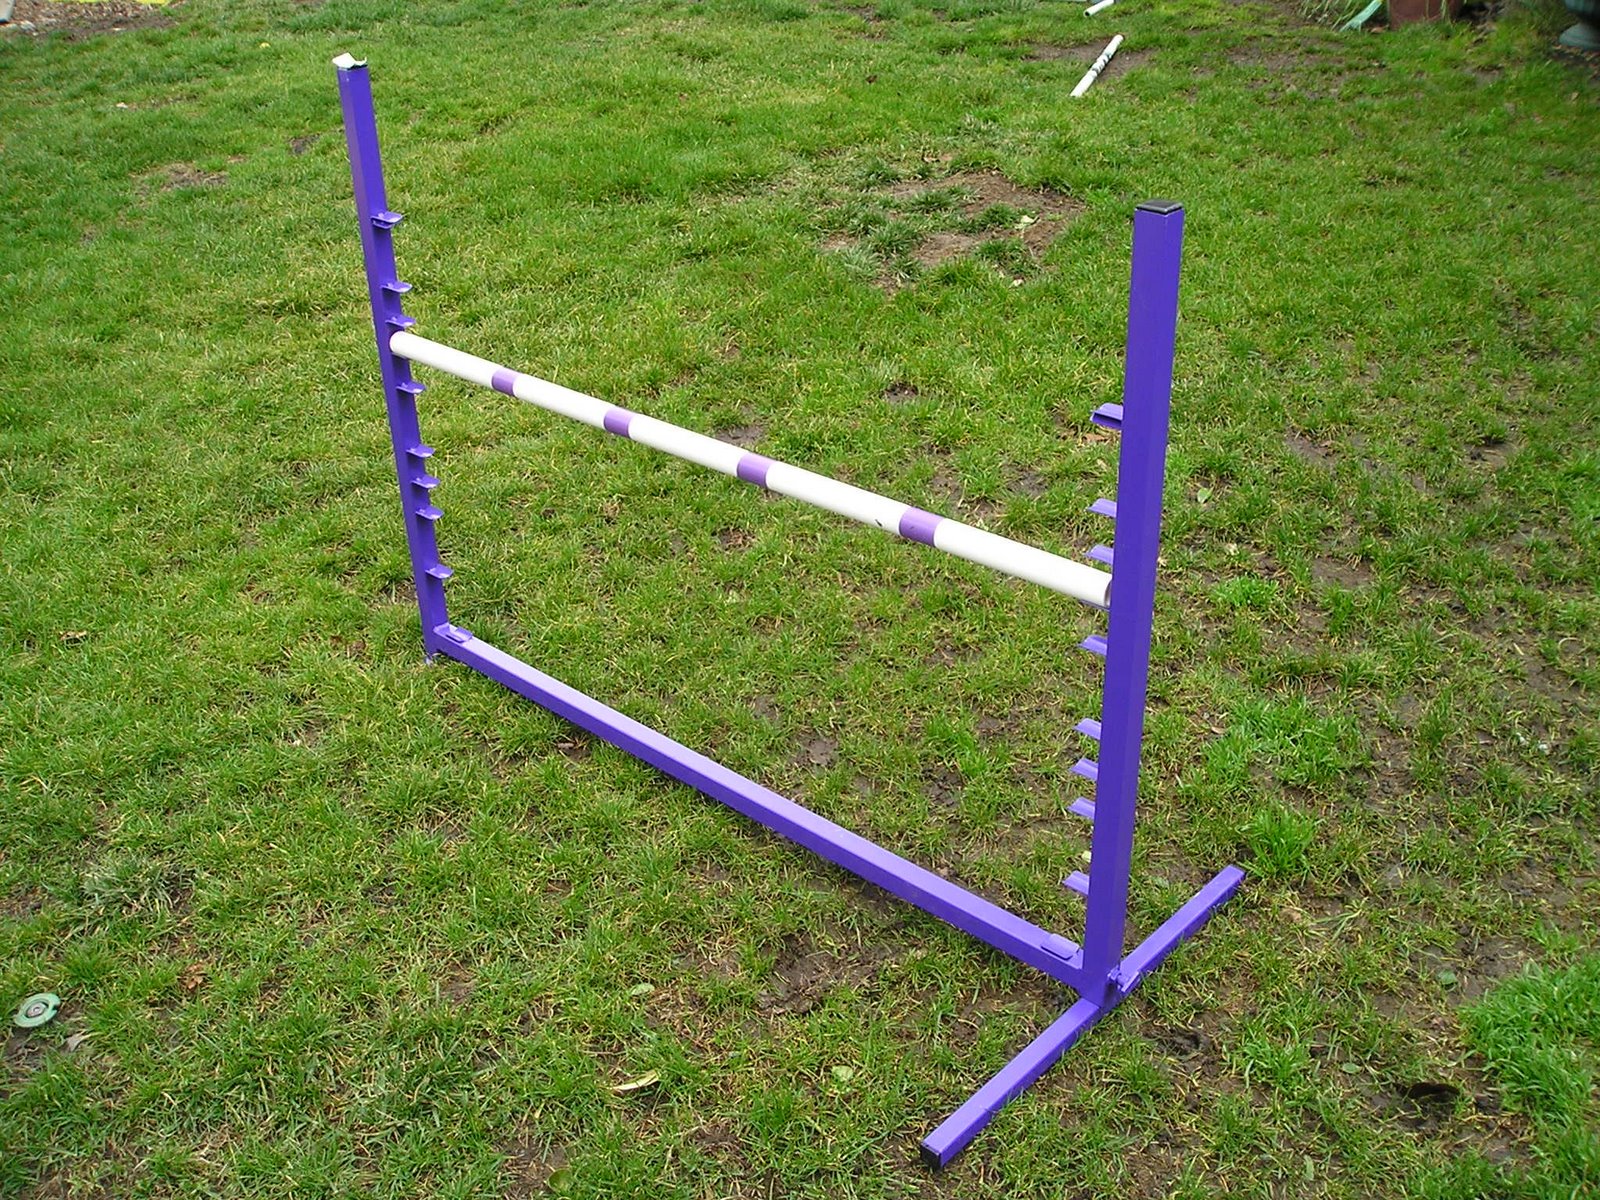
Very cool! OBviously the jump was intended for The Taj MuttHall, what with it being purple and all. Now you need a nice teal one to complement it. :-)
ReplyDeleteYeah, give me another 12 years, I'm sure I can win another one!
ReplyDeleteGreat post! I need another jump, I only have a couple.
ReplyDelete~Nat
Thanks! Let me know if you try it and how it goes; I try to think of everything but it helps to have someone else give it a go.
ReplyDeleteGreat instructions I have just recently decided to put my border collie Tex into agility and I needed a jump design and yours was like the least complex thank you so much. Cambrise and Tex
ReplyDeleteGlad you like 'em! When you actually build the jump, let me know how the instructions worked for you.
ReplyDelete